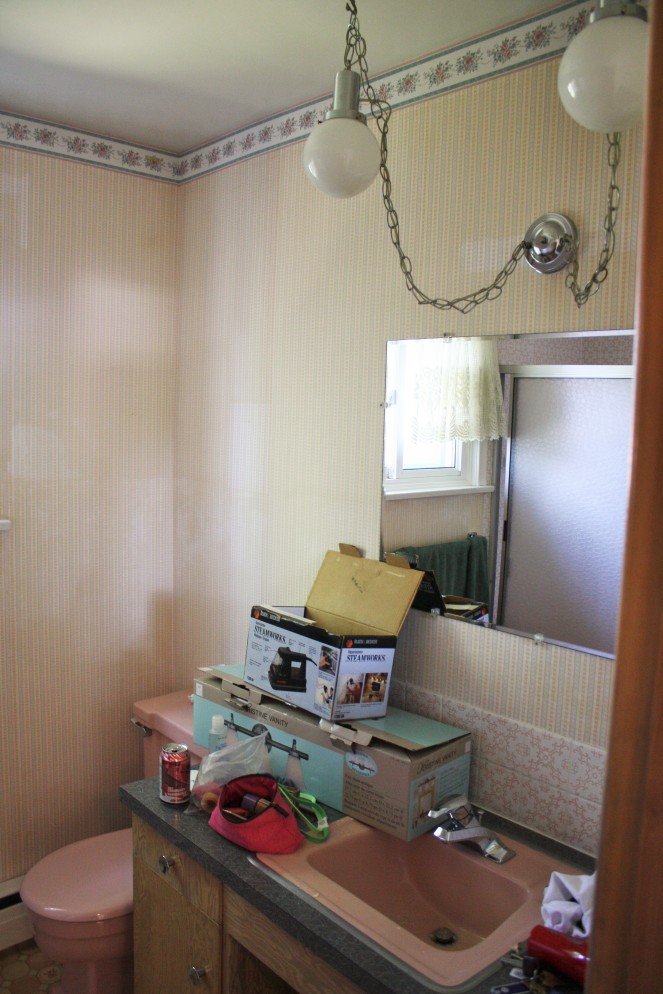
When we first moved into our house 5 years ago we knew our bathroom had to go! But our house was very dated and we had lots of upgrades to do so we ended up living with our pink (but clean) bathroom for a good year before we tackled it. Look at this beauty!
Once the time came to renovate, my DIY game was in full force. At the time, my parents were also redoing their bathroom and buying a new vanity, so in true Shannon fashion, I snatched their old oak vanity for my reno! (Umm hello-who wouldn’t want to save hundreds of dollars). I could see the potential in her – all she needed was a coat of paint. Her first makeover was kind of a fail but ended up working out. I used a dark stain but the colour was awful so I ended up painting over the stain with black paint (I’m not going into details on that makeover because she just got a second makeover but here is an after pic).

Almost all the rooms in my house are painted in light colours but for some reason I went for a darker vibe in my bathroom. After 4 years of it, I got sick of it and decided to brighten up my vanity (this may have been a result of my two maternity leaves making me want to redo everything in our house, but I digress). For this project I used:
- My gloomy looking vanity
- Screwdriver or drill
- Sandpaper or sanding block
- Painters tape
- Paint brush
- Mini roller
- Primer
- Light grey paint (I used left over paint from my kitchen cabinets which was Sherwin Williams – Repose Grey)
- Miniwax Polycrylic Protective Finish (satin finish)
Step 1 – Tape, remove doors and hinges, sand, clean and prime. The prep is the most important step in any project but unfortunately it is the least fun. For this project I gave the painted surface a sanding (using whatever gritt I had available – I like to improvise). Wiped it clean and primed it. Any multi-use primer will do the trick but Stix primer is always a great option.

Step 2 – Paint using brush and mini-roller. Do two coats. Once everything is dry and cured according to directions, you can go ahead and paint. I used a brush most of the time because of hard to reach places but a mini roller comes in handy at times for the side, doors and frame. Just go with it. Once a first coat is done and dry, apply a second coat.
Step 3 – Apply a top coat. I am a huge fan of a top coat on furniture and other pieces that may get a beating. It’s not fun to do, but it’s fairly easy and quick and it’s worth it. My go to is Miniwax Polycrylic Protective Finish (I haven’t tried others though because this one has worked well for me – it’s no odour, water based and effective). Apply 2 or 3 thin coats using a foam brush or roller. Use even strokes and small amounts so it doesn’t clump, pool and turn yellow
Step 4 – Add your hardware and Enjoy! You can go buy new hardware or use the ones you have. An inexpensive option is to check out your local Habitat for Humanity Restore or Kijiji for new- to- you hardware. Believe it or not you could always spray paint gold, outdated hardware too. I used the hardware I had because I was too tired to care. Here is the final product! Stay tuned for an upcoming post when I paint the bathroom walls!


Shannon you were meant to blog. I love your posts 🙂
LikeLike
Thanks so much Emily! Glad you are enjoying the posts.
LikeLike